文章来源:http://www.codeproject.com/Articles/3542/How-to-do-Application-Initialization-while-showing?rp=/KB/cs/AppLoadingArticle/AppLoading1.zip
Update 28.01.03
This article has been updated withChris Austin'ssuggestion (Thanks Chris!
And thanks toPhil Bolducfor the fix on Chris' stuff ;)) and an alternative (multithreaded) approach has been added, based onJabesidea
(Thanks Jabes!).
Introduction
This articles shows how to display a splash screen during your application initialization. This article assumes that you familiar with C# and the VS.NET IDE.
Background
I had put the lot of my initialization code into the main formsOnLoad()override. The code parsed
configuration files, created control and the such. When my application started up, it looked like a mess: The main application form just didn't pop up nicely and ready to be used. I decided to create a Splash Screen, which should pop up right after starting
the executable. While the splash screen was shown, I wanted to do my initialization and once that was done, I'd hide the splash screen and show the main application window. This article contains various approaches on how it can be realized.
Version A: Quick 'n Dirty
This version was the quick and dirty solution I came up with. Credits toChris
Austinfor suggesting the usage of theApplicationContextclass.
Preparations
- Create a new empty Windows Forms project.
- Add a new Form (for your splash screen and name it SplashForm).
1. Moving the Applications entry procedure
This is not required, but helps a beginning developer understand that theMain()entry point and
the Form1 class into which it is put by default are not necessarily coupled. So let's create a new class called AppLoader and put the entry point in there. Once done, the class should look like this:
public class AppLoader
{
	public AppLoader()
	{
	}
	[STAThread]
	static void Main()
	{
	}
}
Once completed, remove the code from your Form1.cs so that you don't end up having 2 entry points.
2. Creating the Splash Screen
Just create a new Windows Form, place a PictureBox on it and set a couple of properties just to make it look nicer. The form should be centered on the screen (StartPosition),
be topmost (TopMost) and shouldn't have a border (FormBorderStyle).
As for the PictureBox, set theDockproperty to Fill and set theImageproperty
to your splash image. That's it. In real life, you might want to write some code to display the application name, it's version, the registered user and a copyright notice, etc.
3. Modifying the MainForm's code
Now we need to do some modifications to the Form1 class. Since some initialization code can be put into the class constructor (such as reading files, etc.) some can't (like creating controls) sincethisis
not available in the constructor. So you can't for example add controls to a formsControlscollection. Lets add a new public method (e.g.public
void PreLoad(){...}). This function should look somewhat like this:
public void PreLoad()
{
	if (_Loaded)
	{
		//	just return. this code can't execute twice!
		return;
	}

	//	do your initialization here
	//	...

	//	flag that we have loaded all we need.
	_Loaded = true;
}
The_Loadedvariable is a private bool, which should be initialized tofalse.
You definitely should check this flag in your main formsOnLoad()override (which is called just before the form is shown the first time). For example:
protected override void OnLoad(System.EventArgs e)
{
	if (!_Loaded)
	{
		//	good idea to throw an exception here.
        //    the form shouldn't be shown w/o being initialized!
		return;
	}
}
4. Modifying the AppLoader class
Here is the code for theAppLoaderclass. See the comments for information.
public class AppLoader
{
	private static ApplicationContext context;
	private static SplashForm sForm = new SplashForm();
	private static MainForm mForm  = new MainForm();
	[STAThread]

	static void Main(string[] args)
	{
		//	first we retrieve an application context for usage in the
        //    OnAppIdle event handler
		context = new ApplicationContext();

		//	then we subscribe to the OnAppIdle event...
		Application.Idle += new EventHandler(OnAppIdle);

		//	...and show our SplashForm
		sForm.Show();

		//	instead of running a window, we use the context
		Application.Run(context);
	}

	private static void OnAppIdle(object sender, EventArgs e)
	{
		if(context.MainForm == null)
		{
			//	first we remove the eventhandler
			Application.Idle -= new EventHandler(OnAppIdle);

			//	here we preload our form
			mForm.PreLoad();

			//	now we set the main form for the context...
			context.MainForm = mForm;

			//	...show it...
			context.MainForm.Show();

			//	...and hide the splashscreen. done!
			sForm.Close();
			sForm = null;
		}
	}
}
Version B: Multithreaded
This version entirely based onJabesidea. For more information read the
Messages below. Thanks again to Jabes for letting me use his stuff in this article!
In this version, the SplashForm is shown in a separate thread and displays the current loading status (like in PhotoShop). You will want to multi-thread your splash screen if it is going to be
on-screen for any length of time; by running the splash screen from its own message pump, screen redraws and other windows messages are processed correctly giving a more professional impression.
Preparations
- Create a new empty Windows Forms project.
- Add a new Form (for your splash screen and name it SplashForm).
- Repeat the steps from the previous Section which create the AppLoader class containing the entry point for the application. Leave the Method Body for
Main()empty
for now. Don't forget to remove theMain()method from the Form1 code!
1. Modify the SplashForm
In order to display the loading status on the form, we need to place a label on the form. For our example we call it lStatusInfo. Additionally we create a get/set Property named StatusInfo. After
that we introduce a private string member called _StatusInfo which maps directly to the Property. The Property implementation should look like this:
public string StatusInfo {
	set {
		_StatusInfo = value;
		ChangeStatusText();
	}
	get {
		return _StatusInfo;
	}
}
ChangeStatusText()is a helper function which will be called each time the StatusInfo should be updated.
It's implementation should look like this:
public void ChangeStatusText() {
	try {
		if (this.InvokeRequired) {
			this.Invoke(new MethodInvoker(this.ChangeStatusText));
			return;
		}

		lStatusInfo.Text = _StatusInfo;
	}
	catch (Exception e) {
		//	do something here...
	}
}
The check for theInvokeRequiredproperty is necessary because controls are not thread safe. So if
you call a method on a control from a different thread (then the one which created the control) without marshalling the call into the proper thread, weird things might happen.
That's it. Let's create the Splasher class which maintains Thread creation, start and stop.
2. Creating the Splasher class
The static membersShow(),Close()and
theStatusproperty can be used as their names suggest to show and close the SplashWindow as well as to update the loading status displayed on the SplashForm (using
theStatusInfoProperty previously created).
Here is what the implementation of the class looks like:
public class Splasher
{
	static SplashForm MySplashForm = null;
	static Thread MySplashThread = null;

	//	internally used as a thread function - showing the form and
	//	starting the messageloop for it
	static void ShowThread()
	{
		MySplashForm = new SplashForm();
		Application.Run(MySplashForm);
	}

	//	public Method to show the SplashForm
	static public void Show()
	{
		if (MySplashThread != null)
			return;

		MySplashThread = new Thread(new ThreadStart(Splasher.ShowThread));
		MySplashThread.IsBackground = true;
		MySplashThread.ApartmentState = ApartmentState.STA;
		MySplashThread.Start();
	}

	//	public Method to hide the SplashForm
	static public void Close()
	{
		if (MySplashThread == null) return;
		if (MySplashForm == null) return;

		try
		{
			MySplashForm.Invoke(new MethodInvoker(MySplashForm.Close));
		}
		catch (Exception)
		{
		}
		MySplashThread = null;
		MySplashForm = null;
	}

	//	public Method to set or get the loading Status
	static public string Status
	{
		set
		{
			if (MySplashForm == null)
			{
				return;
			}

			MySplashForm.StatusInfo = value;
		}
		get
		{
			if (MySplashForm == null)
			{
				throw new InvalidOperationException("Splash Form not on screen");
			}
			return MySplashForm.StatusInfo;
		}
	}
}
Ok, let’s look at what we have here:
TheShow()method will create a new Thread using the staticShowThreadfunction
as a target. This function will simply show the Form and start a MessageLoop for it. TheClose()method will again marshal a call to the SplashFormsClose()method
into the appropriate thread thus causing the form to close. TheStatusProperty can be used to retrieve or update the StatusInfo displayed on the SplashScreen.
Here are some simple examples of their usage:
...
// note that there is no instance required since those functions are static
Splasher.Show(); // shows the SplashScreen
// sets the status info displayed on the SplashScreen
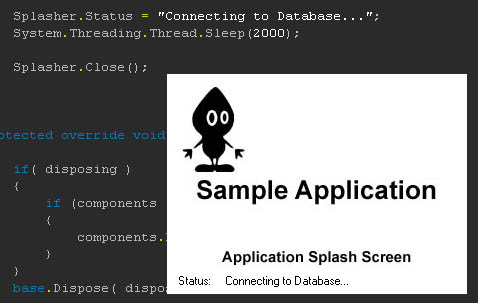
Splasher.Status = "Initializing Database Connection...";
Splasher.Close(); // closes the SplashScreen
...
Modifying the AppLoader class
In order to use the Splasher class we have to modify our AppLoader class appropriately:
public class AppLoader
{
	public AppLoader()
	{

	}
	[STAThread]
	static void Main(string[] args)
	{
		Splasher.Show();
		DoStartup(args);
		Splasher.Close();
	}

	static void DoStartup(string[] args)
	{
		//	do whatever you need to do
		Form1 f = new Form1();
		Application.Run(f);
	}
}
First we show theSplashFormand set the initialStatusInfotext.
Then we callDoStartup(), a good place to put any initialization code which doesn't require a form to be created.
Why moving the Startup Code into an extra function you might ask. The answer is simple: Since the Jitter works on a per function basis, it won’t need to do too much code before your Splash-Screen
is actually getting shown on the screen.
To ensure that after you main Application form is loaded, it actually gets focused; you might want to put the following statement into the Form1OnLoadoverride:
this.Activate();
分享到:


相关推荐
这是在VS2005环境下的创建启动画面的源代码.代码中还有其它功能,用户不用多理会.只要能帮你实现启动画面功能就行了.找相应的代码即可.
本文实例讲述了c#制作简单启动画面的方法。分享给大家供大家参考。具体分析如下: 启动画面是程序启动加载组件时一个让用户稍微耐心等待的提示框。一个好的软件在有启动等待需求时必定做一个启动画面。启动画面可以...
创建一个透明的启动画面-类似于Adobe使用的启动画面。
C#提供了快速创建单元测试的方法,但单元测试不仅速度慢不方便,大量的单元测试还会拖慢项目的启动速度。 所以决定自己搞个方便的测试用例。 控制台调用 只需要简简单单的一句话 测试用例.注册并Print(EnumEx.Name)...
本文介绍如何创建具有Alpha通道图像和半透明边框的启动画面。
在运行时实例化,使组件进行通信,创建详细的2D UI,使用BitBucket,使用虚拟控件,制作C#类,自定义粒子效果,播放器启动以及更多功能(REF:AA_CU2) 如何建立/编译 这是一个Unity项目。 如果您熟悉源代码管理,...
设置项目成员设置项目图标用户任务概述创建文档编辑文件创建资源链接编辑...创建/编辑日期数据库计数实体数据库结果排序数据库结果限制自定义数据字段活动提要数据库管理员主题选择器手动时间跟踪自动时间跟踪启动画面
你可以使用Visual Basic 或Visual C#作为开发语言来创建应用程序。在本教程中,选择C#来作为开发语言。点击“新建项目”菜单项后,在打开的“新建项目”对话框中,双击左边的“Visual C#”使其成为展开状态,然后...
一旦api档案建立完成且在正确的路径系统,键入Ctrl+Space(你可以修改这个键盘捷径)启动字词自动完成功能(参考字词自动完成功能画面)。 欲知更详尽的资讯,请参考字词自动完成功能线上辅助。 支援同时编辑多重文件 ...
826 自 定 义启动 画面 …………………¨………………………………………… 2货 Fhsh游 戏……………………………………………………………………………¨ ⒛9 831 软件安装 ……………………………………¨…………...
超酷的娱乐多媒体设计:触控移动事件、建立手势、手势判断控制、屏幕保护程序、启动动画、mp3播放器、3gp影片播放、相机预览拍照、自动对焦、调整音量、信息指令遥控手机、录音控制、自定义动画按钮等 Web Service...
超酷的娱乐多媒体设计:触控移动事件、建立手势、手势判断控制、屏幕保护程序、启动动画、mp3播放器、3gp影片播放、相机预览拍照、自动对焦、调整音量、信息指令遥控手机、录音控制、自定义动画按钮等 Web Service...
超酷的娱乐多媒体设计:触控移动事件、建立手势、手势判断控制、屏幕保护程序、启动动画、mp3播放器、3gp影片播放、相机预览拍照、自动对焦、调整音量、信息指令遥控手机、录音控制、自定义动画按钮等 Web Service...
超酷的娱乐多媒体设计:触控移动事件、建立手势、手势判断控制、屏幕保护程序、启动动画、mp3播放器、3gp影片播放、相机预览拍照、自动对焦、调整音量、信息指令遥控手机、录音控制、自定义动画按钮等 Web Service...